Day 1 in yellowstone
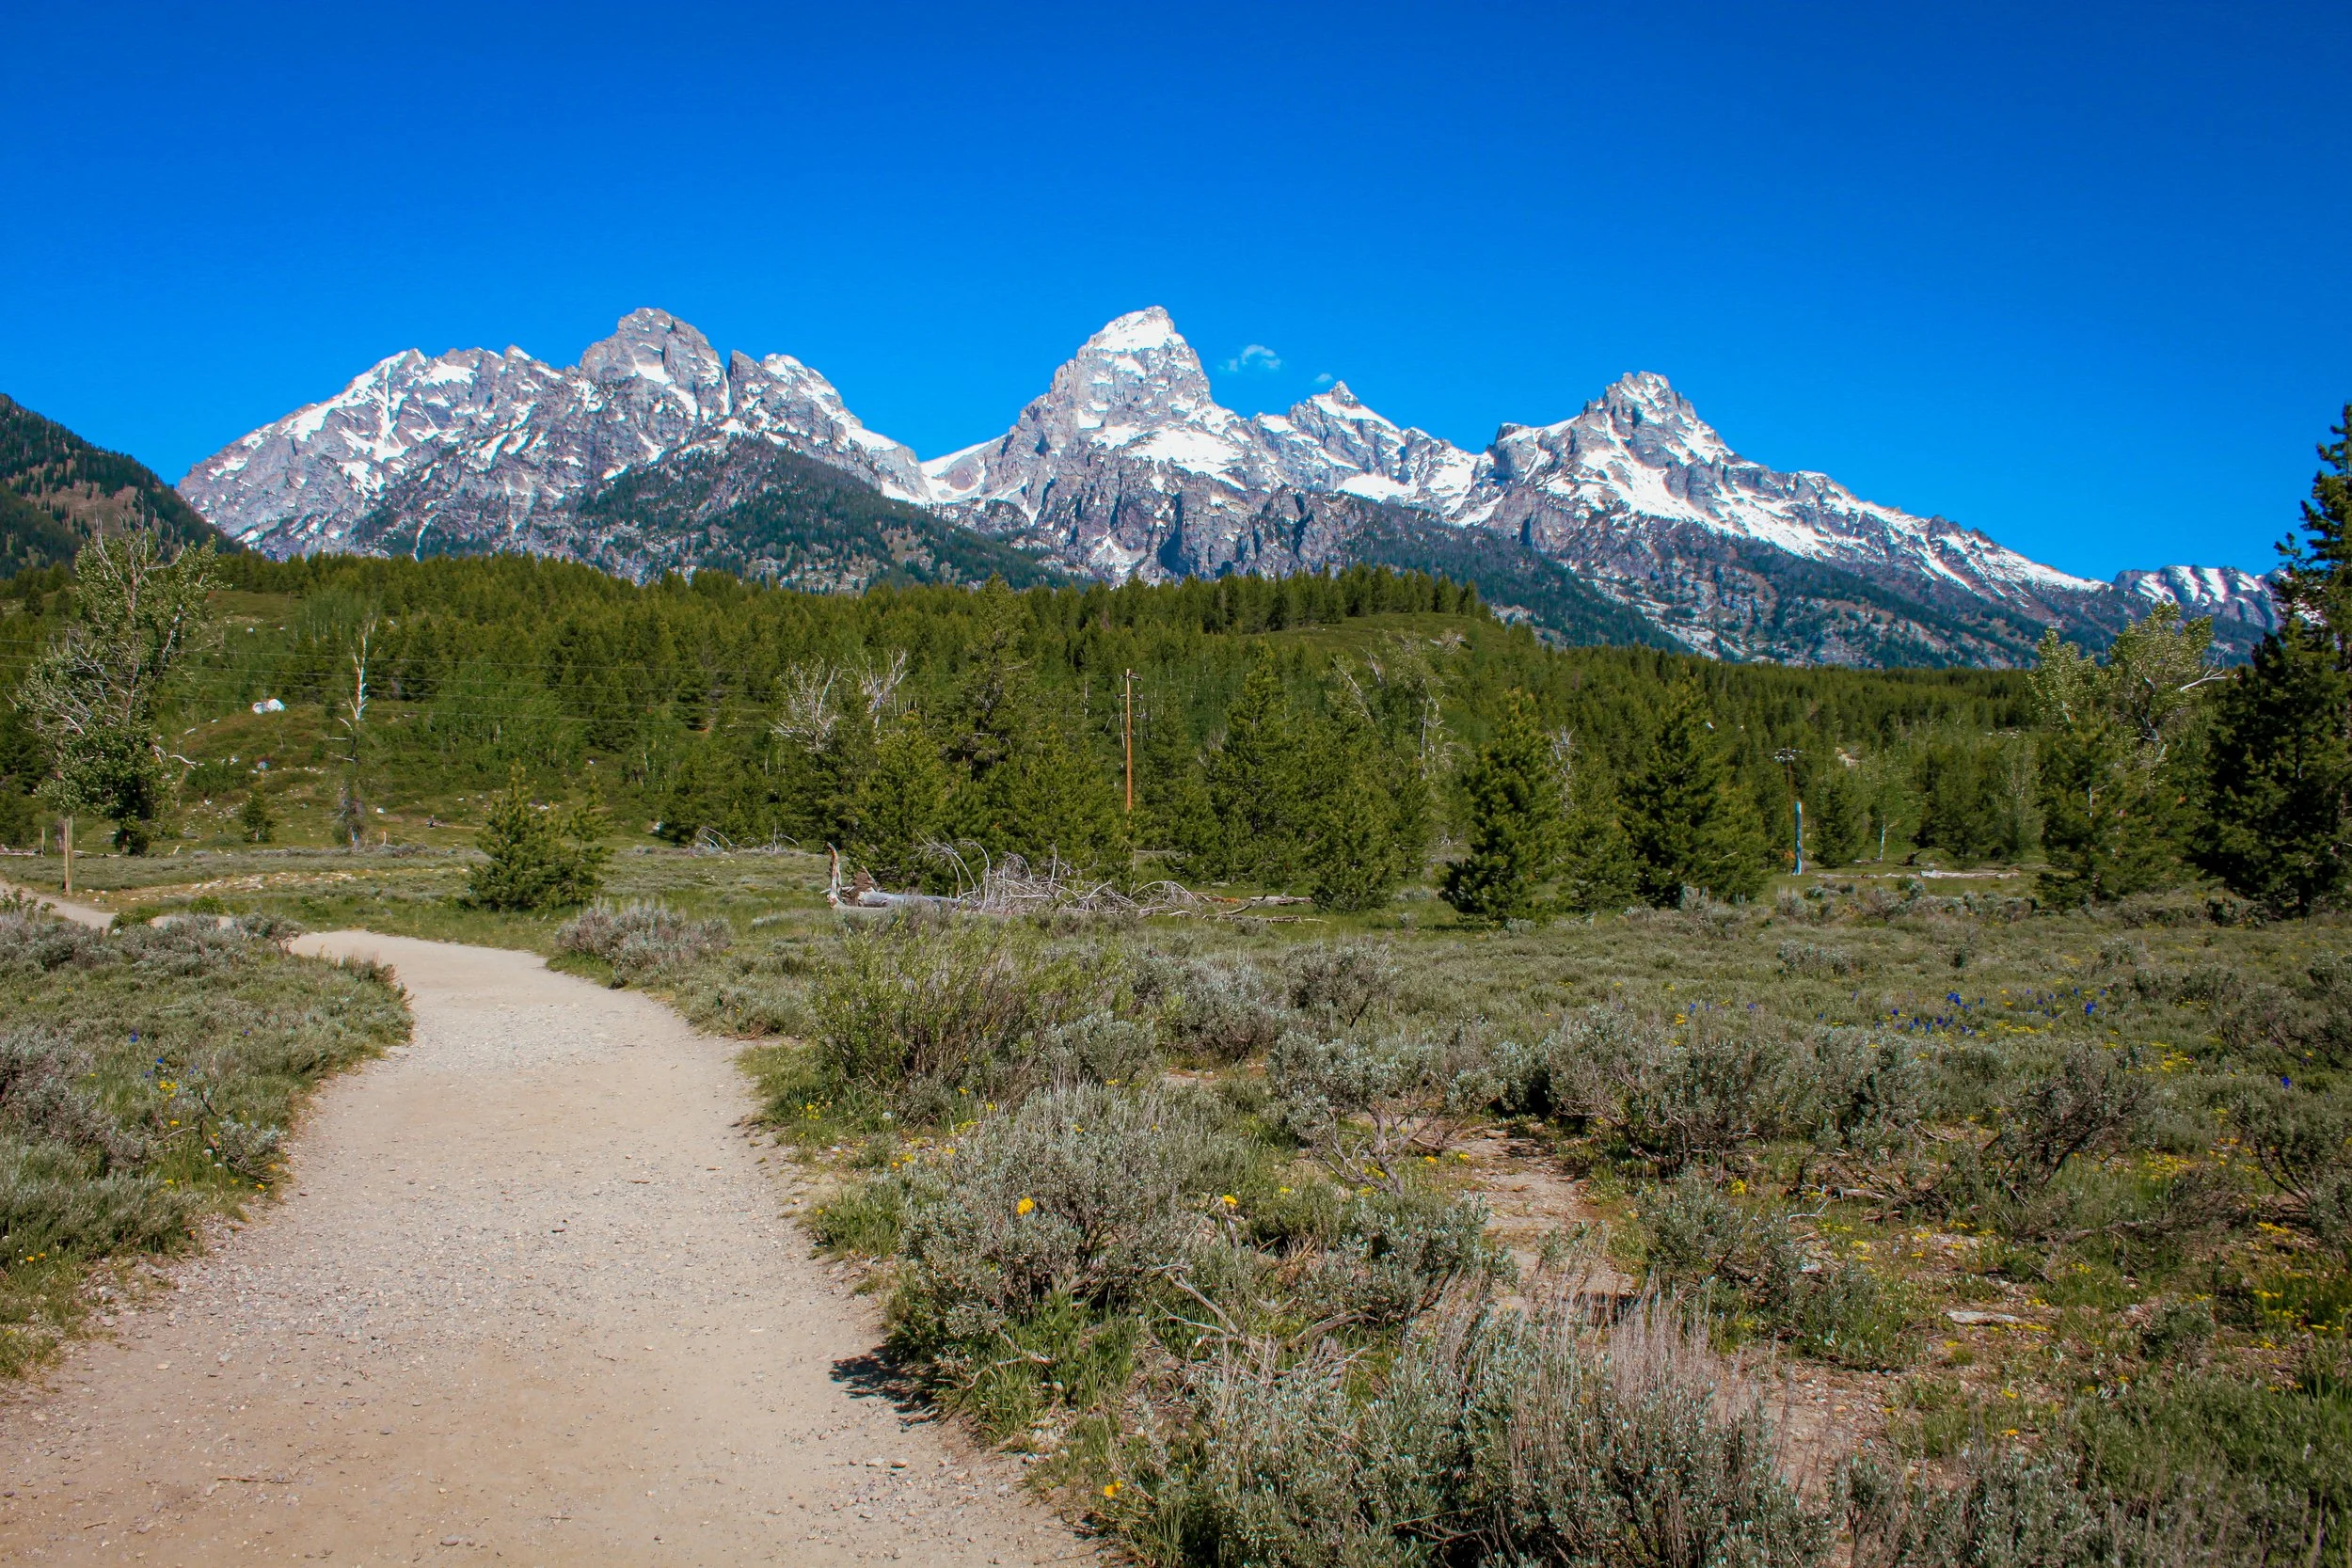
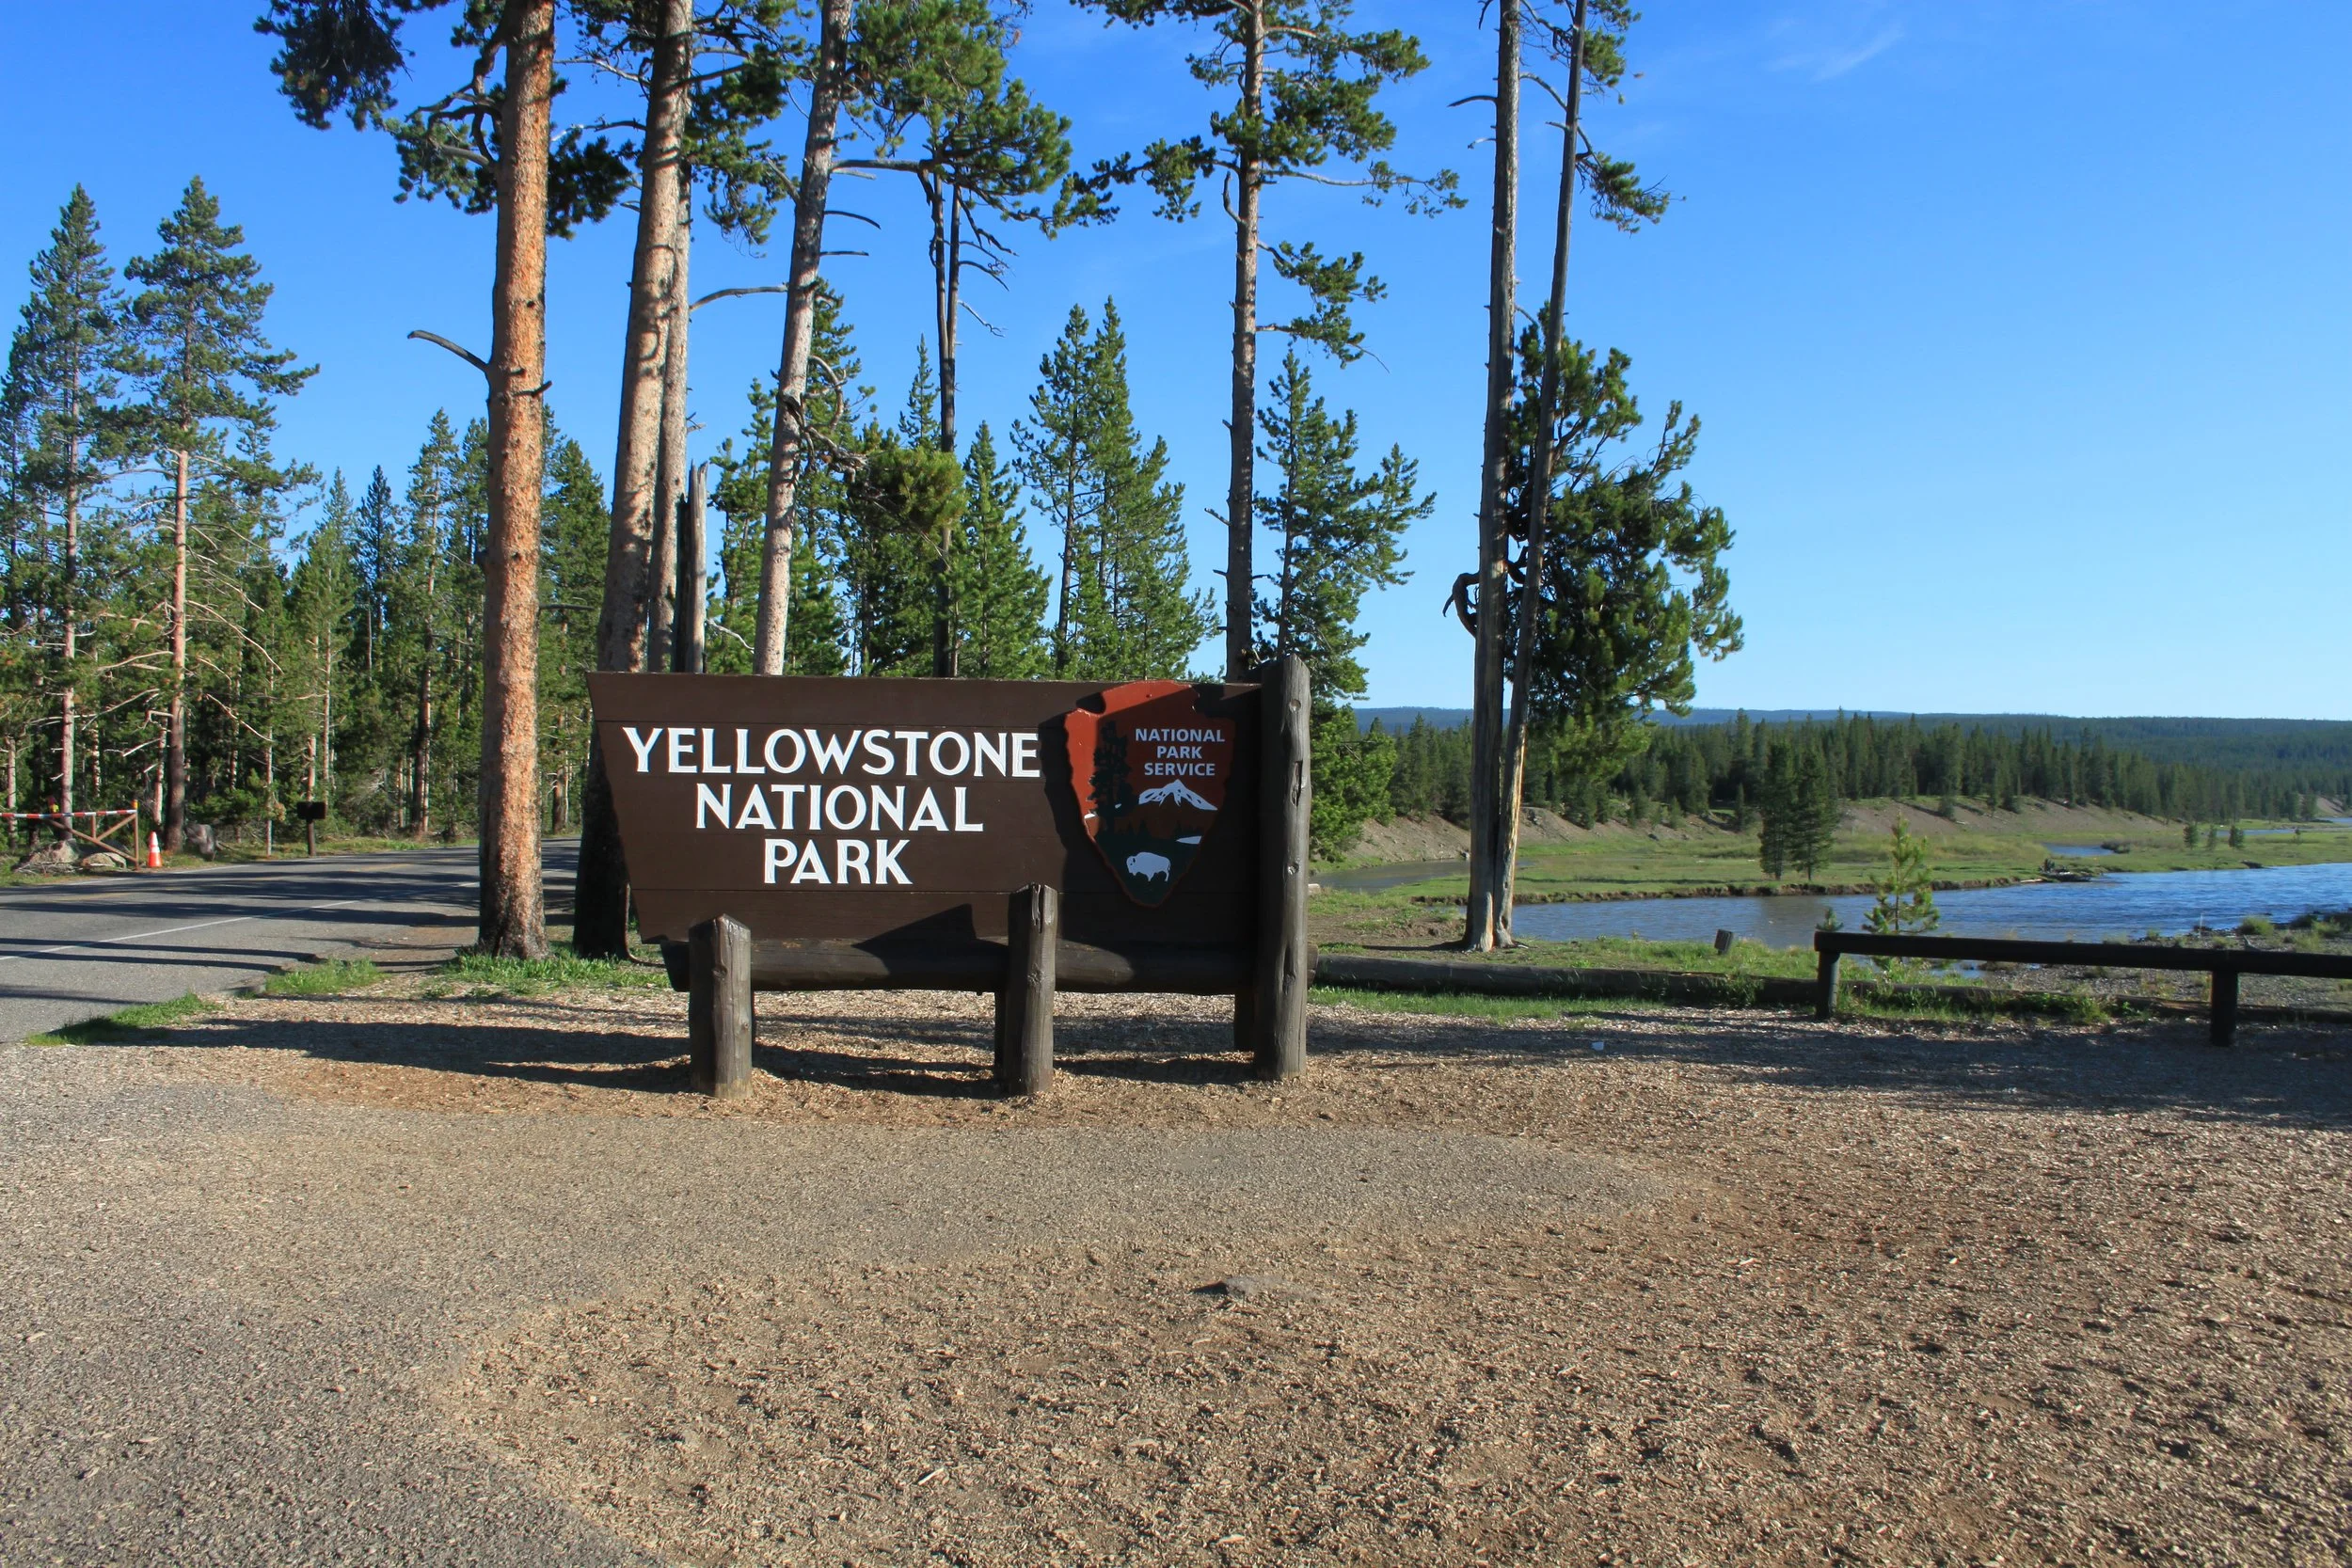
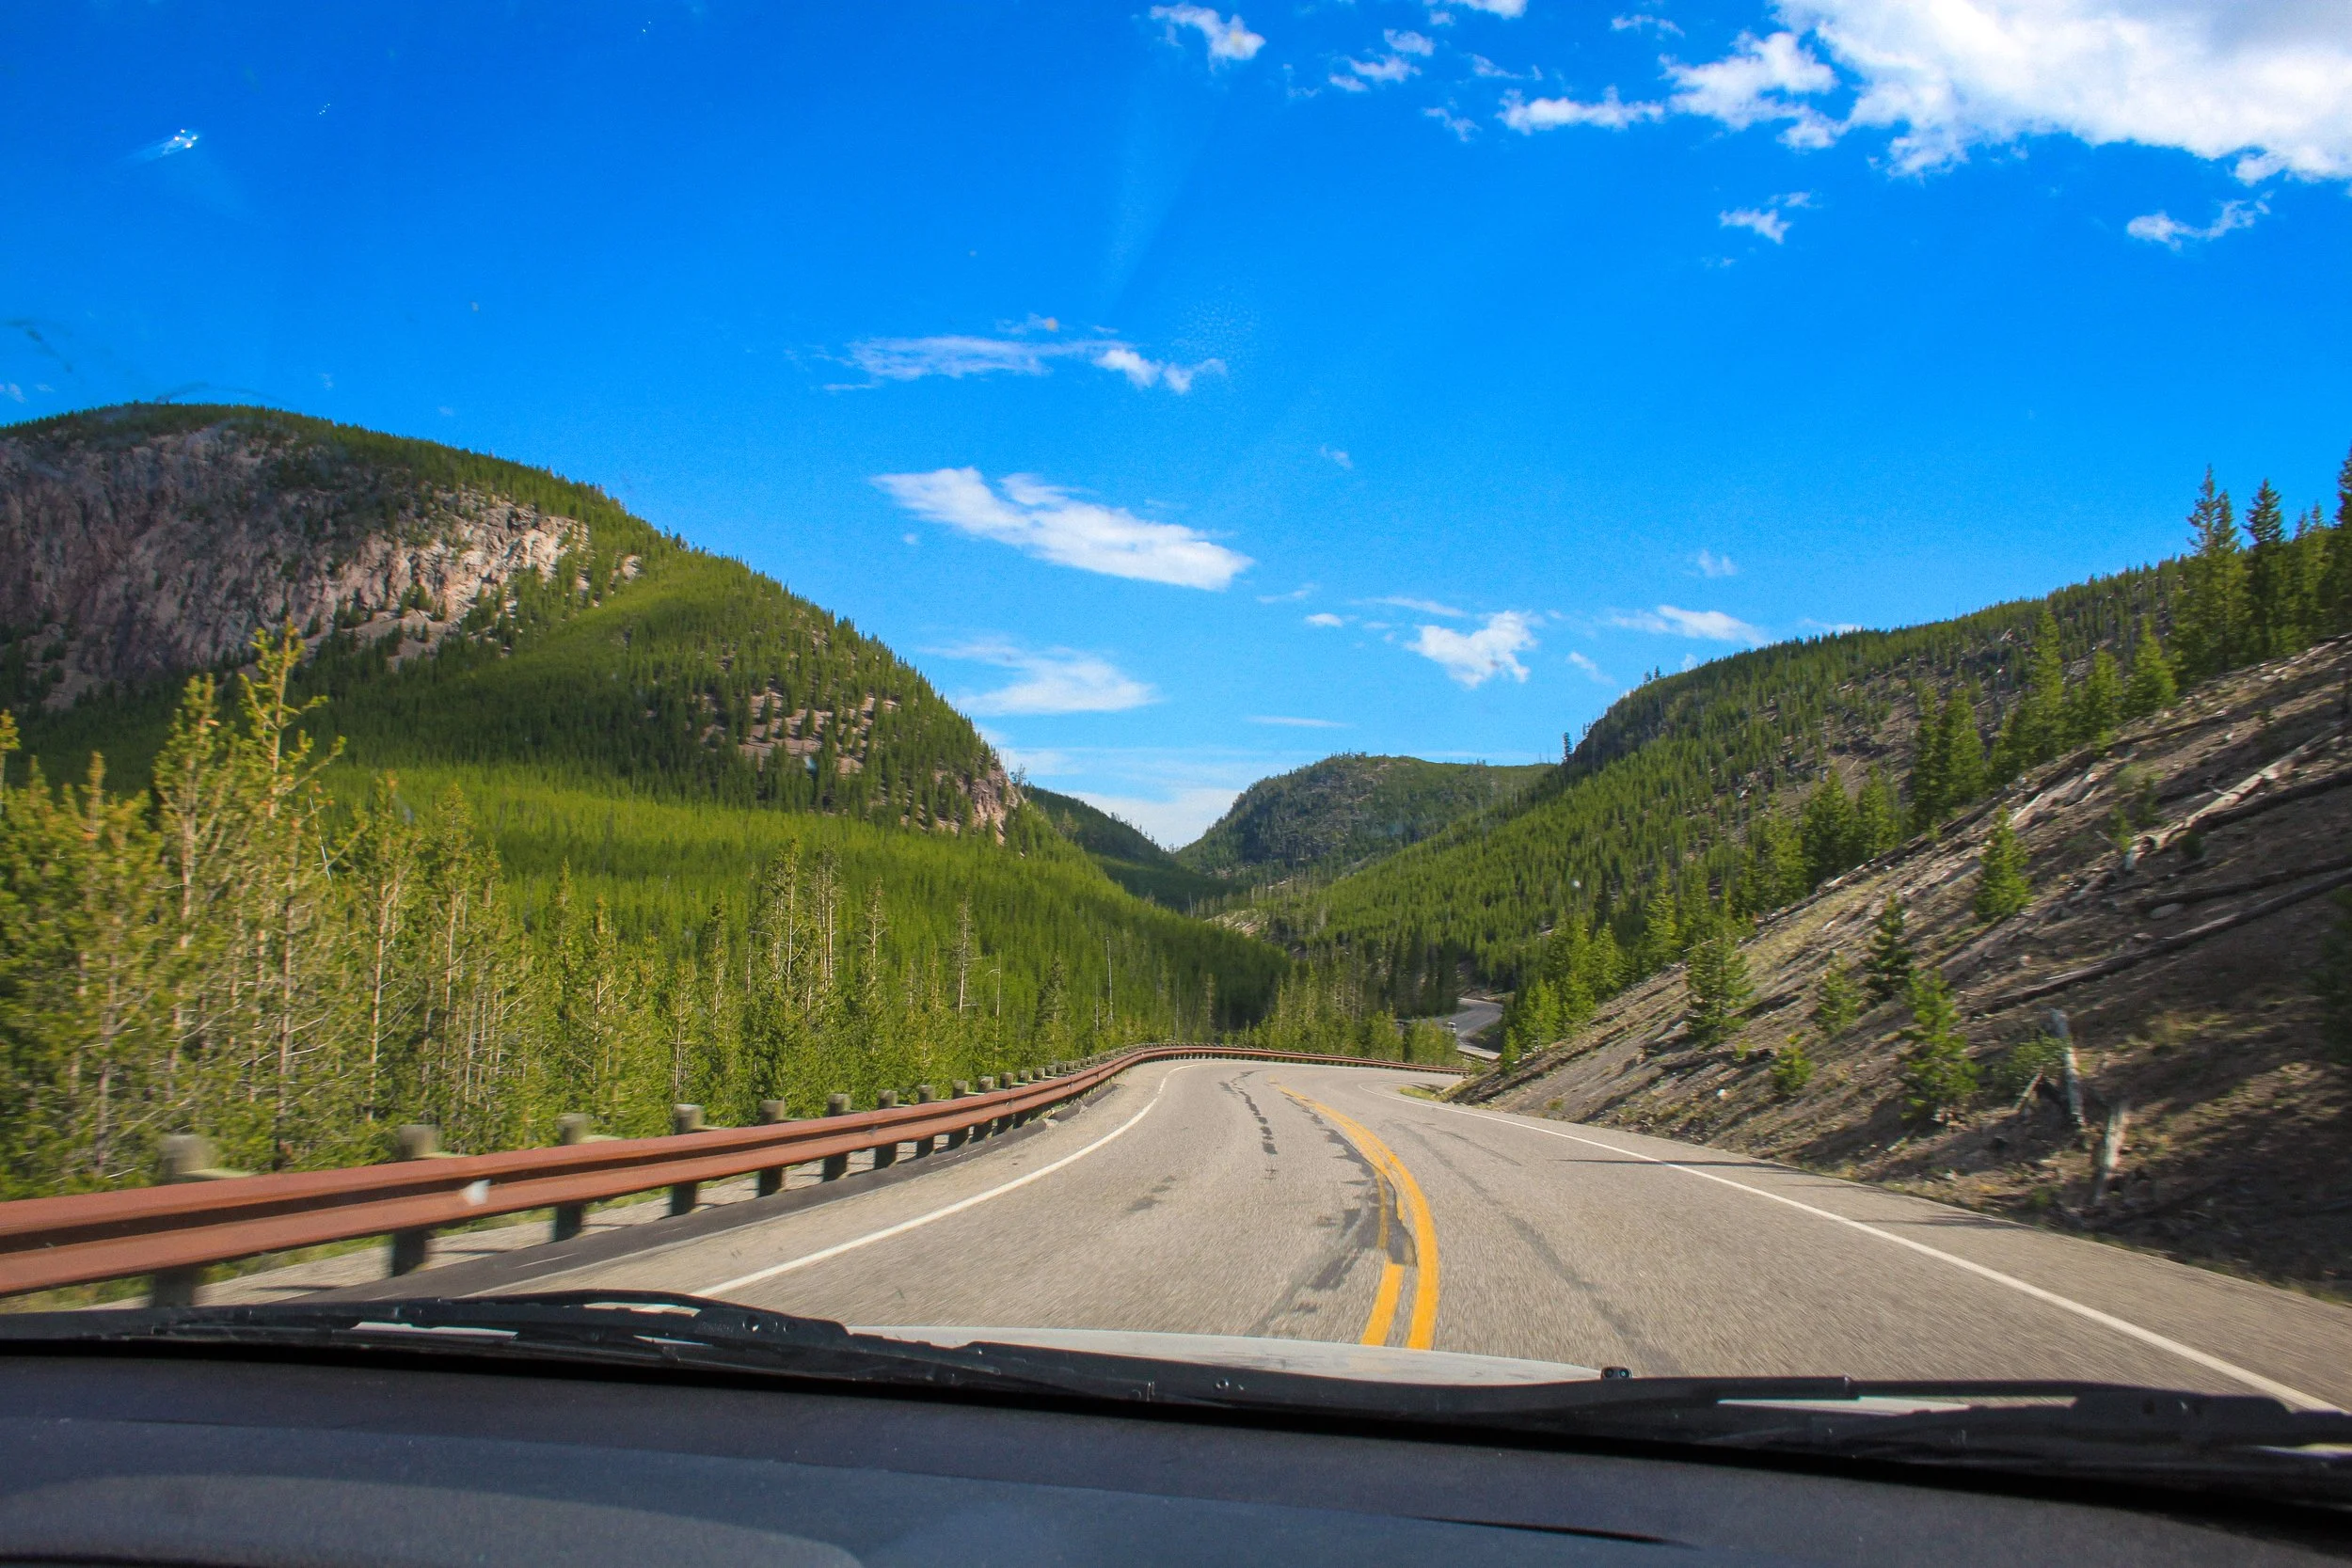
Yellowstone National Park is massive. For our first day in the park we didn’t have a set plan and decided to drive the length of the park. We started at the South Entrance and meandered our way to the North Entrance and back.
Once you are through the South Entrance of the park you drive north with dense woods on either side. Keep your eyes peeled! We saw an incredible amount of elk on either side of the road. As you keep driving you’ll come to an intersection with an option to head East toward Yellowstone Lake or continue straight. We chose to continue heading North and soon after, passed the sign for the Continental Divide
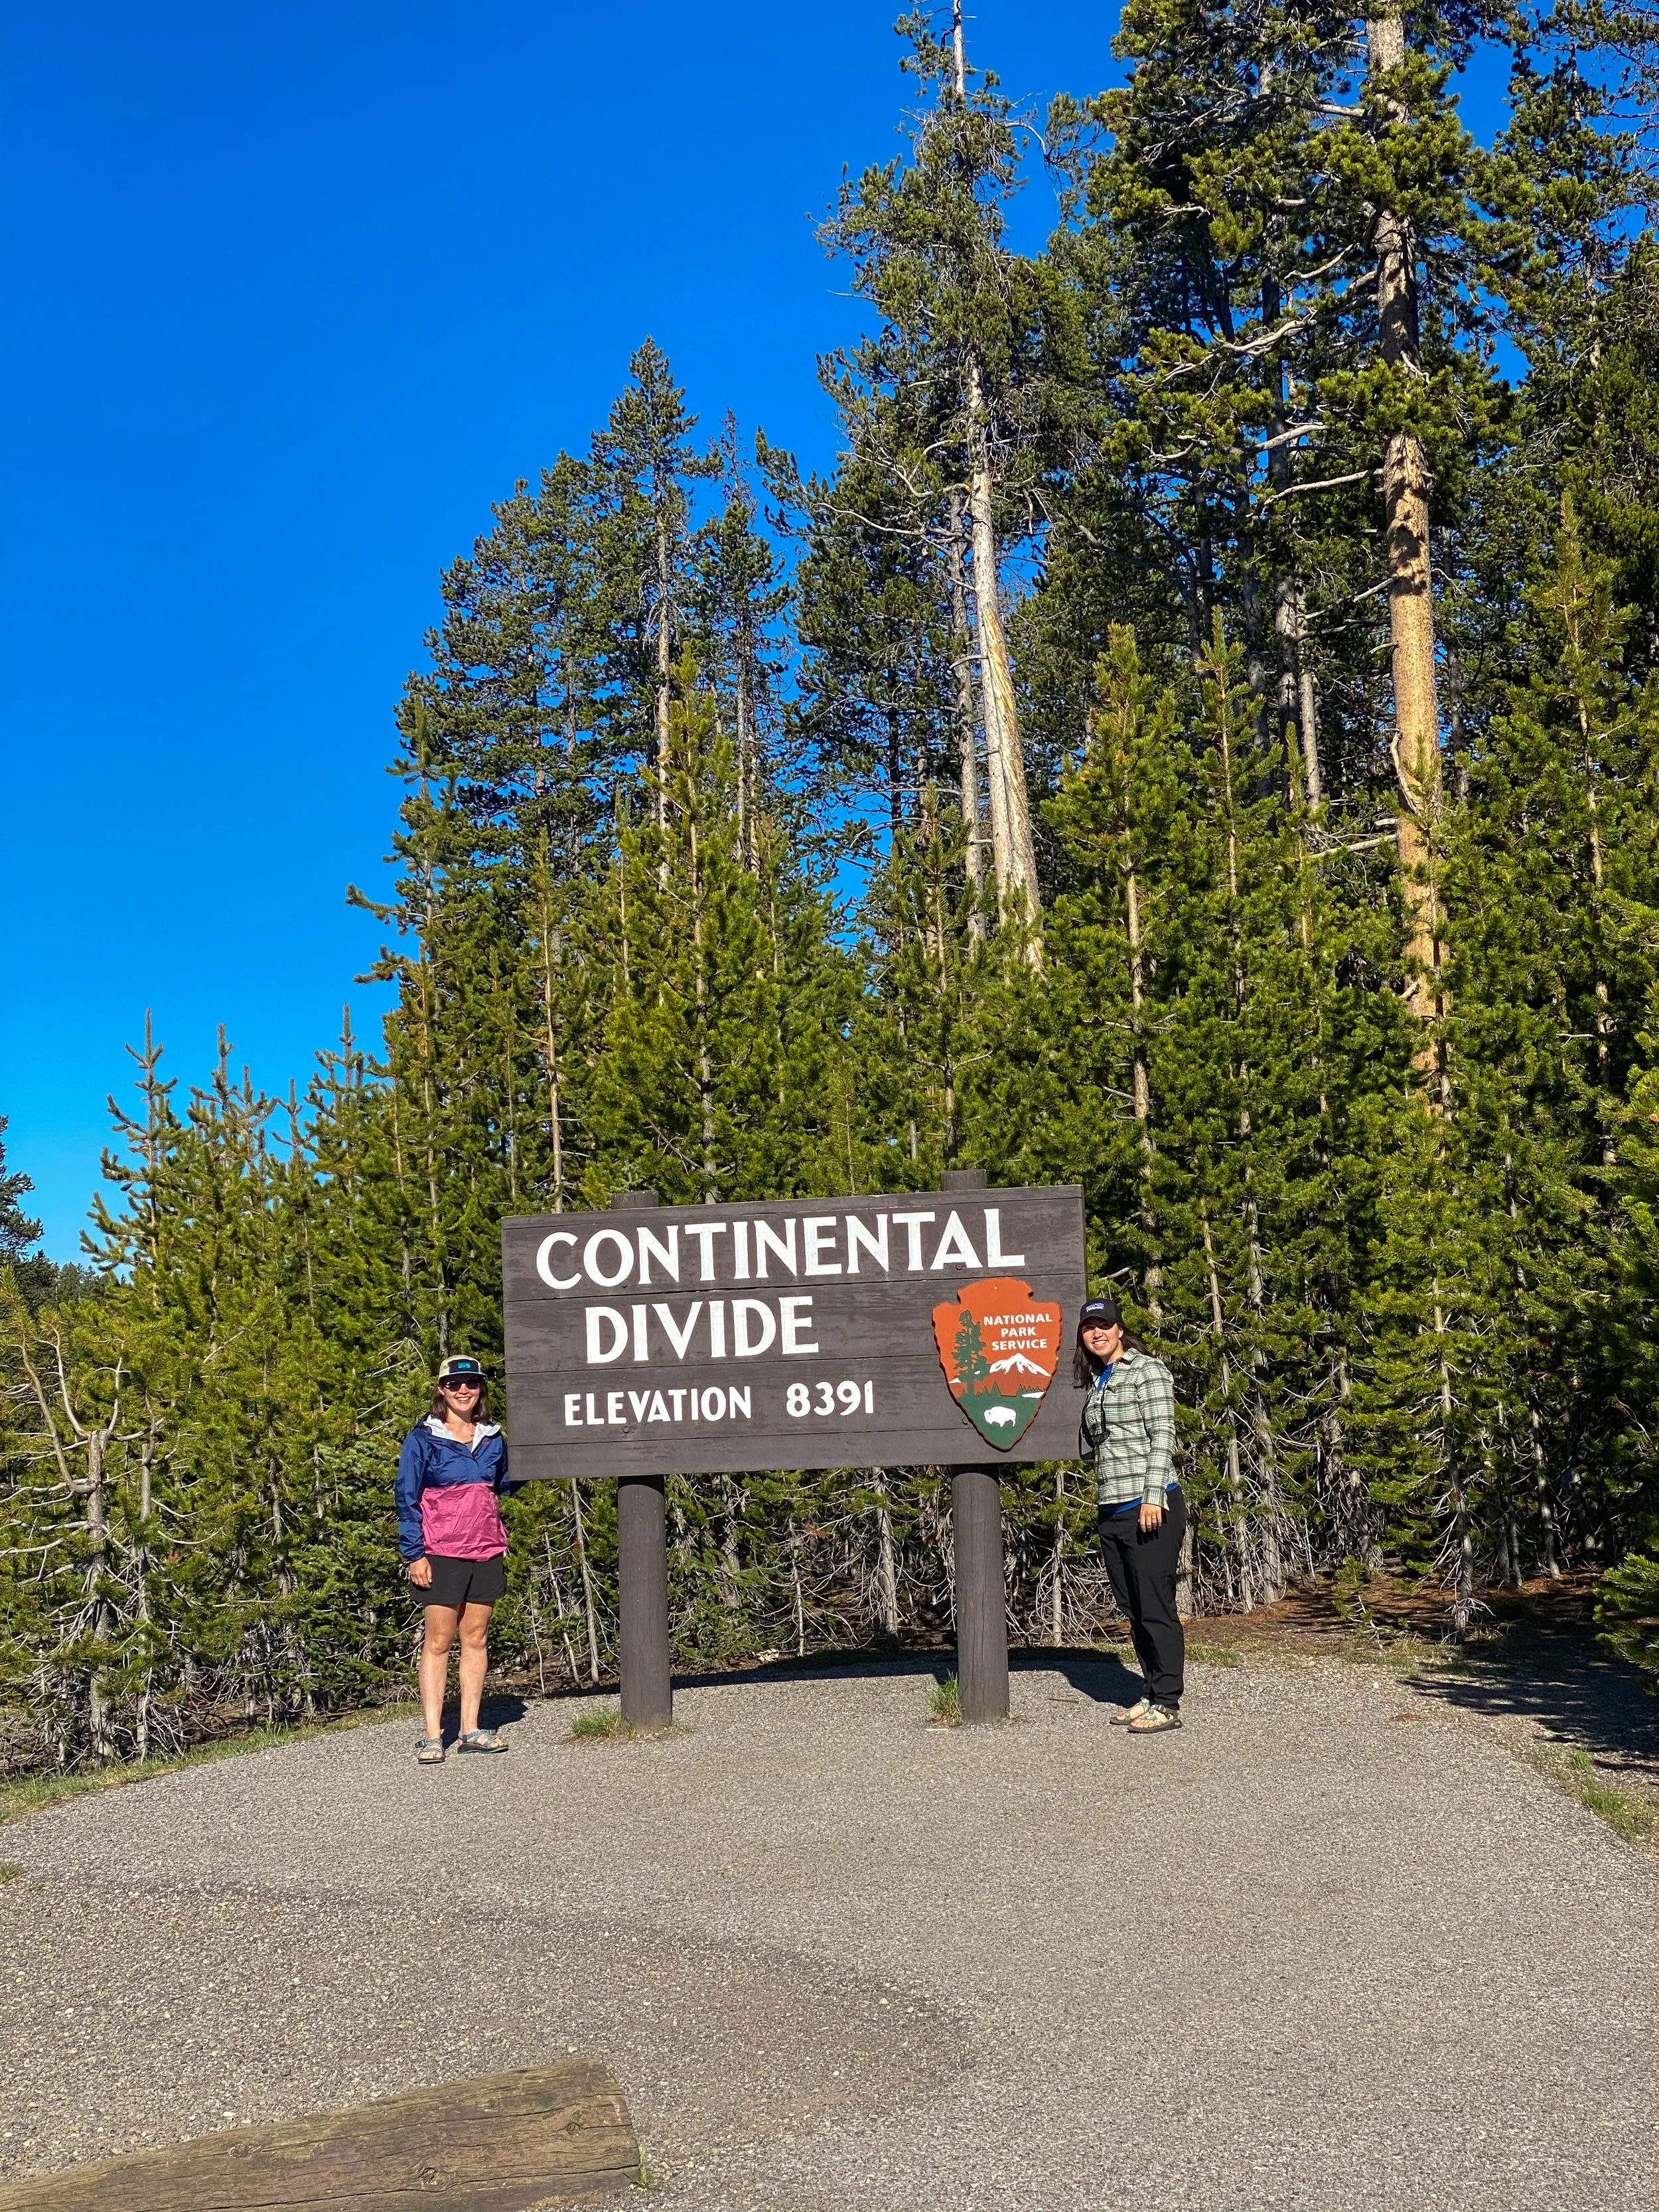
You’ll pass signs for the Continental Divide throughout your drive in the park. The divide marks where the water flow splits for each ocean. On one side of the divide water will flow to the Pacific Ocean and on the other side water will flow to the Atlantic. In this area of the park you’ll also criss cross the Continental Divide Trail.
Shortly after this sign you’ll see signs for Kepler Cascades featuring a waterfall with a 150ft drop and a viewing bridge. Definitely worth the stop.


After enjoying the falls and stretching our legs we continued our drive past Kepler Falls. As you head North you’ll pass signs for Old Faithful, we’ll tackle this another day so keep on keepin’ on. As you continue you’re going to also pass the Midway Geyser Basin, home to Grand Prismatic.

The next stop is Lower Geyser Basin via the Firehole Lake Drive. This is a great way to see a lot of geyser’s. There’s not a lot of crowds and most of the geysers are either next to the road and you can view them from your car or are only a short walk.

About halfway through the drive there is a parking area. Take advantage of it! Park your car and walk around. It wasn’t until after Leah and I were up close to the geysers do you realize how hot they are! Each geyser is a different temperature at the hottest ones it’s hard to even stand close to them.


Behind me is Great Fountain Geyser. Before the walkway there is a sign that lists what times she’ll erupt. Although smaller in height then Old Faithful people say that it’s worth seeing.
After walking around we got in the car to continue our drive. Once we turned back onto the main road we were greeted by a massive bison herd! We pulled the car to the side of the road so we could watch them do their thing. Among the pack there were a few babies. Someone else pulled over told us their called ‘red dogs’ due to their bright brown color at birth.


After watching the Bison roam we got back into the car heading to the North Entrance to see Roosevelt’s Arch.
As you drive through the park the number one rule is to watch for wildlife. Rule number two is if you see cars pulled over, you should too. Cars on the side of the road mean only one thing- wildlife you can’t see from the road. We got lucky enough on day one to see a brown bear rolling around in a field and about 30 minutes north a black bear doing the same. All pictures of wildlife were taken with a telescope lens from a safe distance. Keep a safe distance from all wildlife, this is for your safety and theirs.


One thing that surprised was how much the landscape changed as you drove through the park. At the South entrance it was dense forests and plains. When we reached the North Entrance and Roosevelt Arch the landscape was more dry mountains and sharper hills.
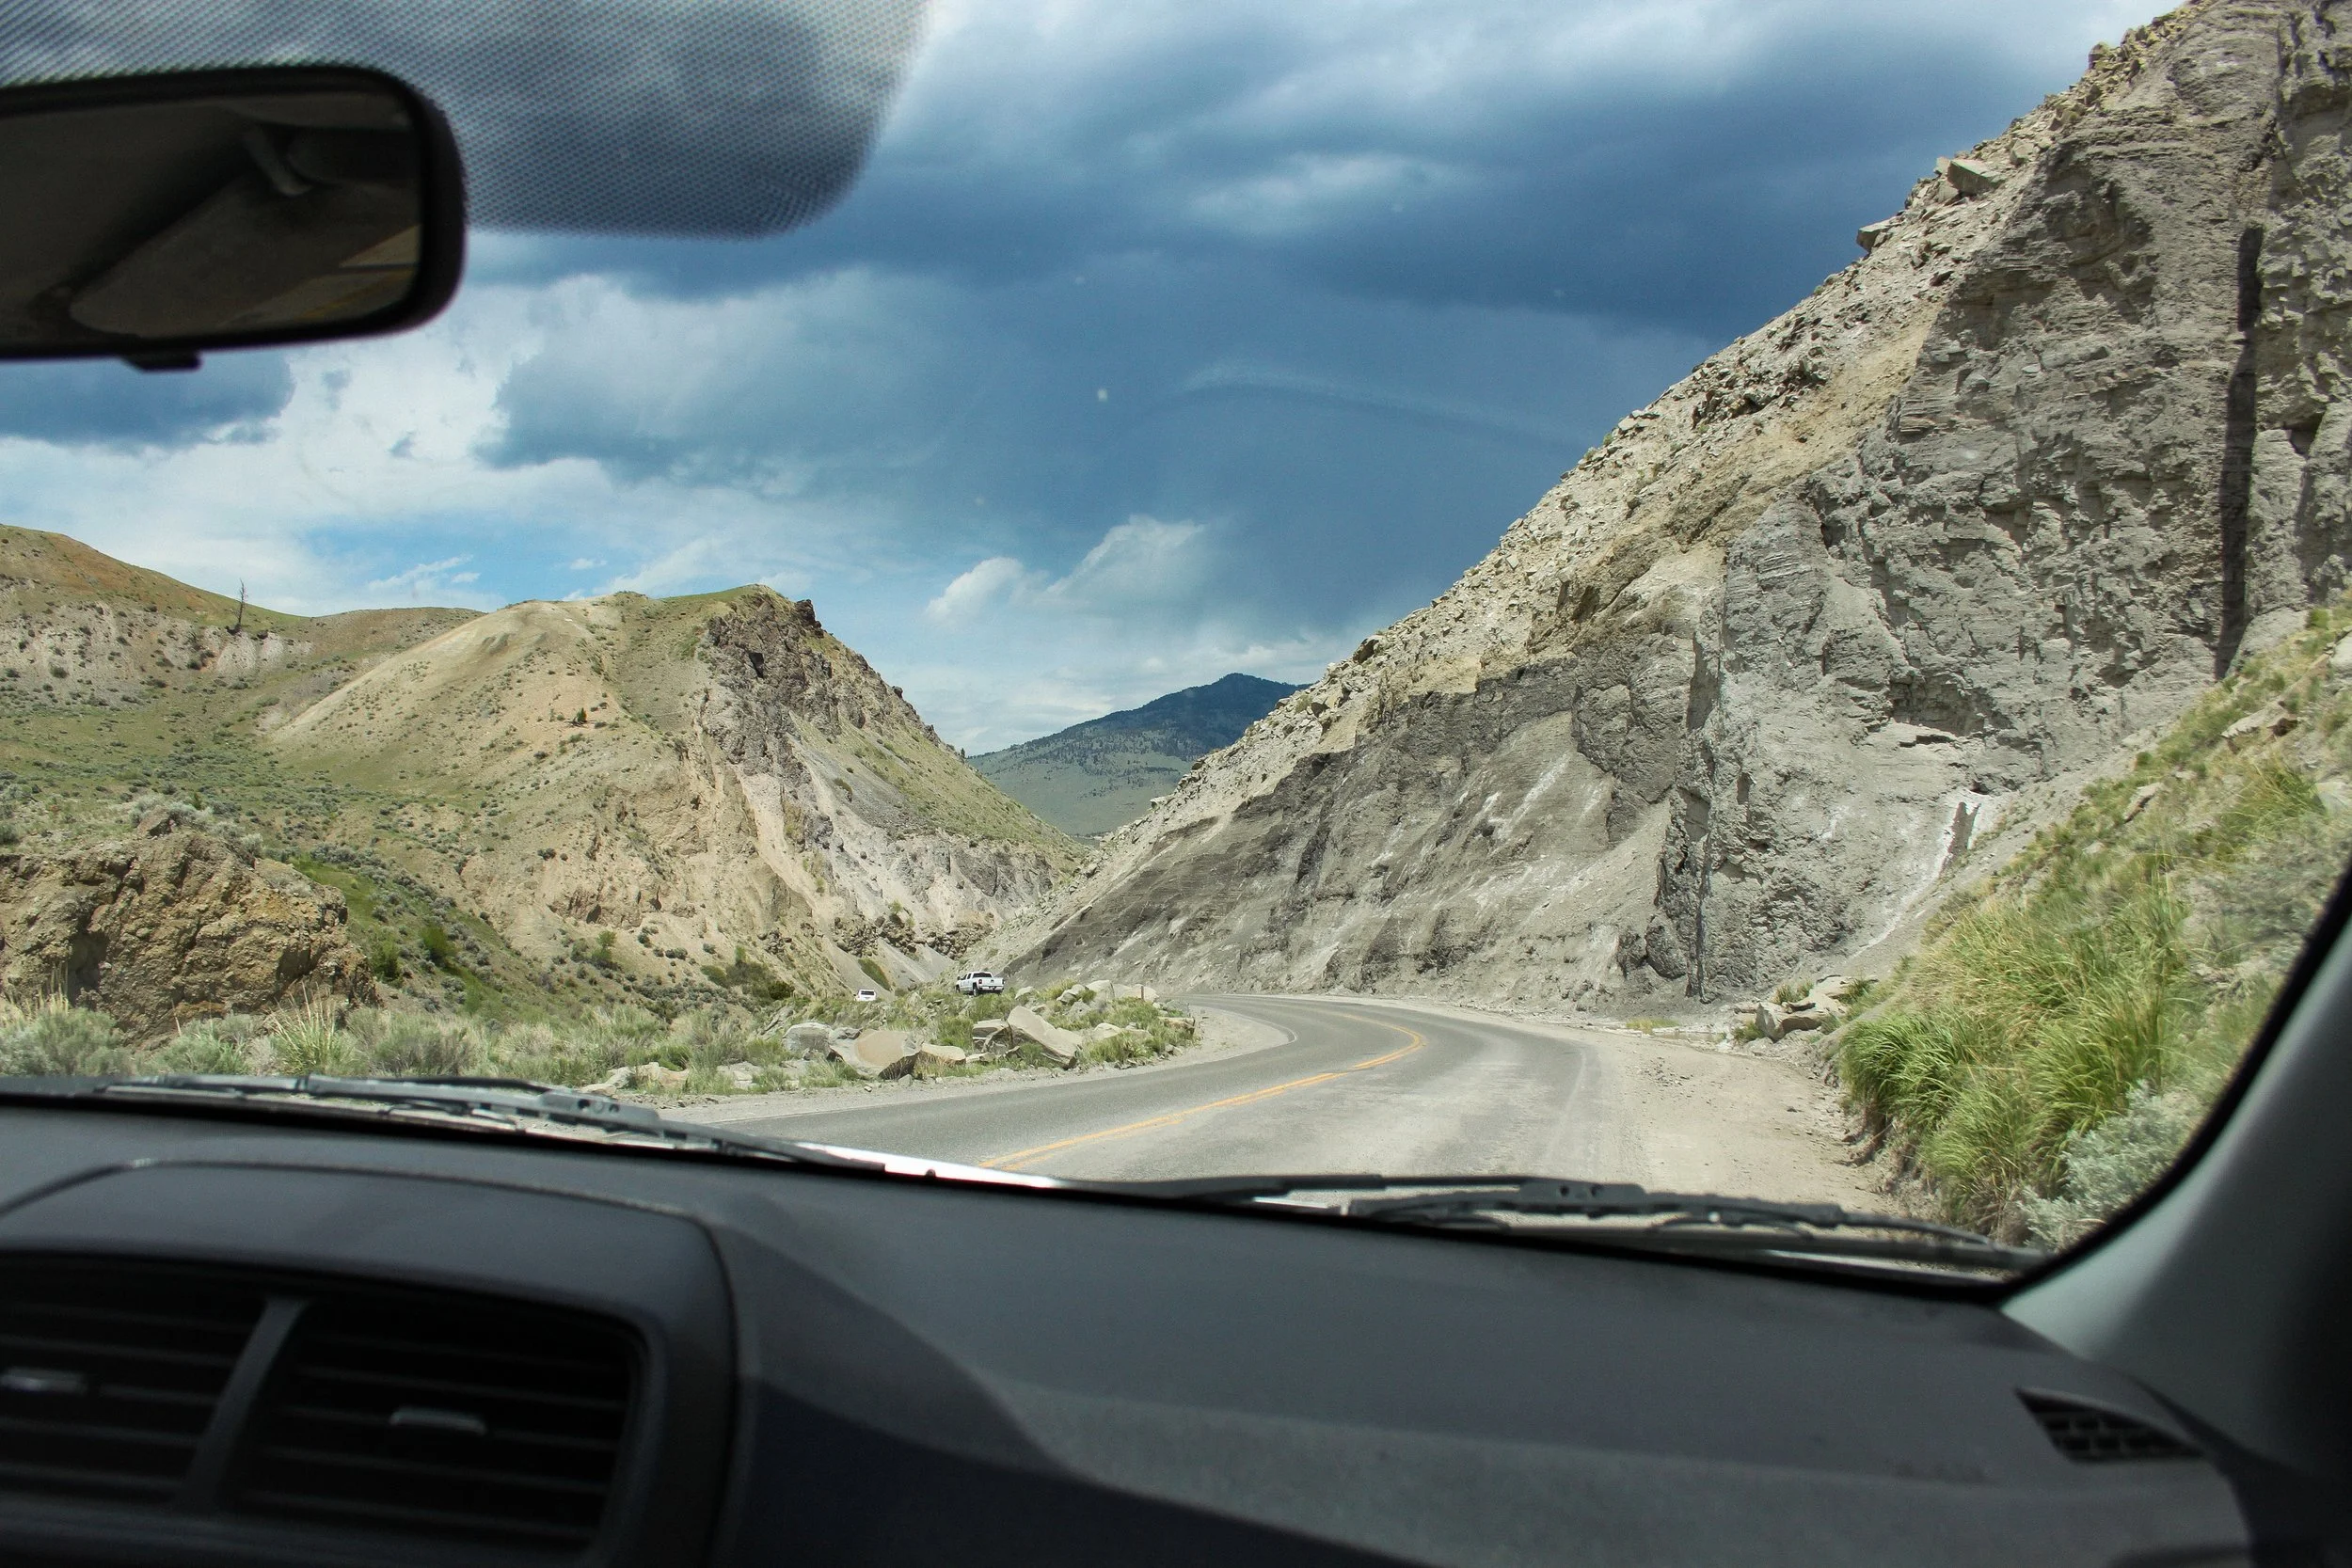
After exiting the park in Montana and seeing Roosevelt Arch we explored Gardiner for a little bit. Although the town isn’t big there are some great little shops and a grocery store where we stopped and got lunch supplies. After eating lunch and having a cup of coffee we hopped in the car to head back to the South Entrance and our campground. On our way back traffic had calmed down and we were able to get a parking spot to stop and explore Mammoth Hot Springs.


The Hot Springs should be a must-see on everyones trip. There are a series of boardwalks and viewing platforms that allow you to move through the hot springs and see all the different formations. As we were walking around we kept saying how we felt like we were in a different planet! Also, be aware that some of the hot springs produce a very strong sulfur smell.
After the springs as you descend back into valley you can see for miles. We noticed a huge back up of cars going the opposite direction at what looked like a stand still. As we kept driving we experienced one of the best things the park has to offer- A Bison Jam! This was the perfect way to end a fully packed day one
Day 2 in yellowstone (trip day 4)
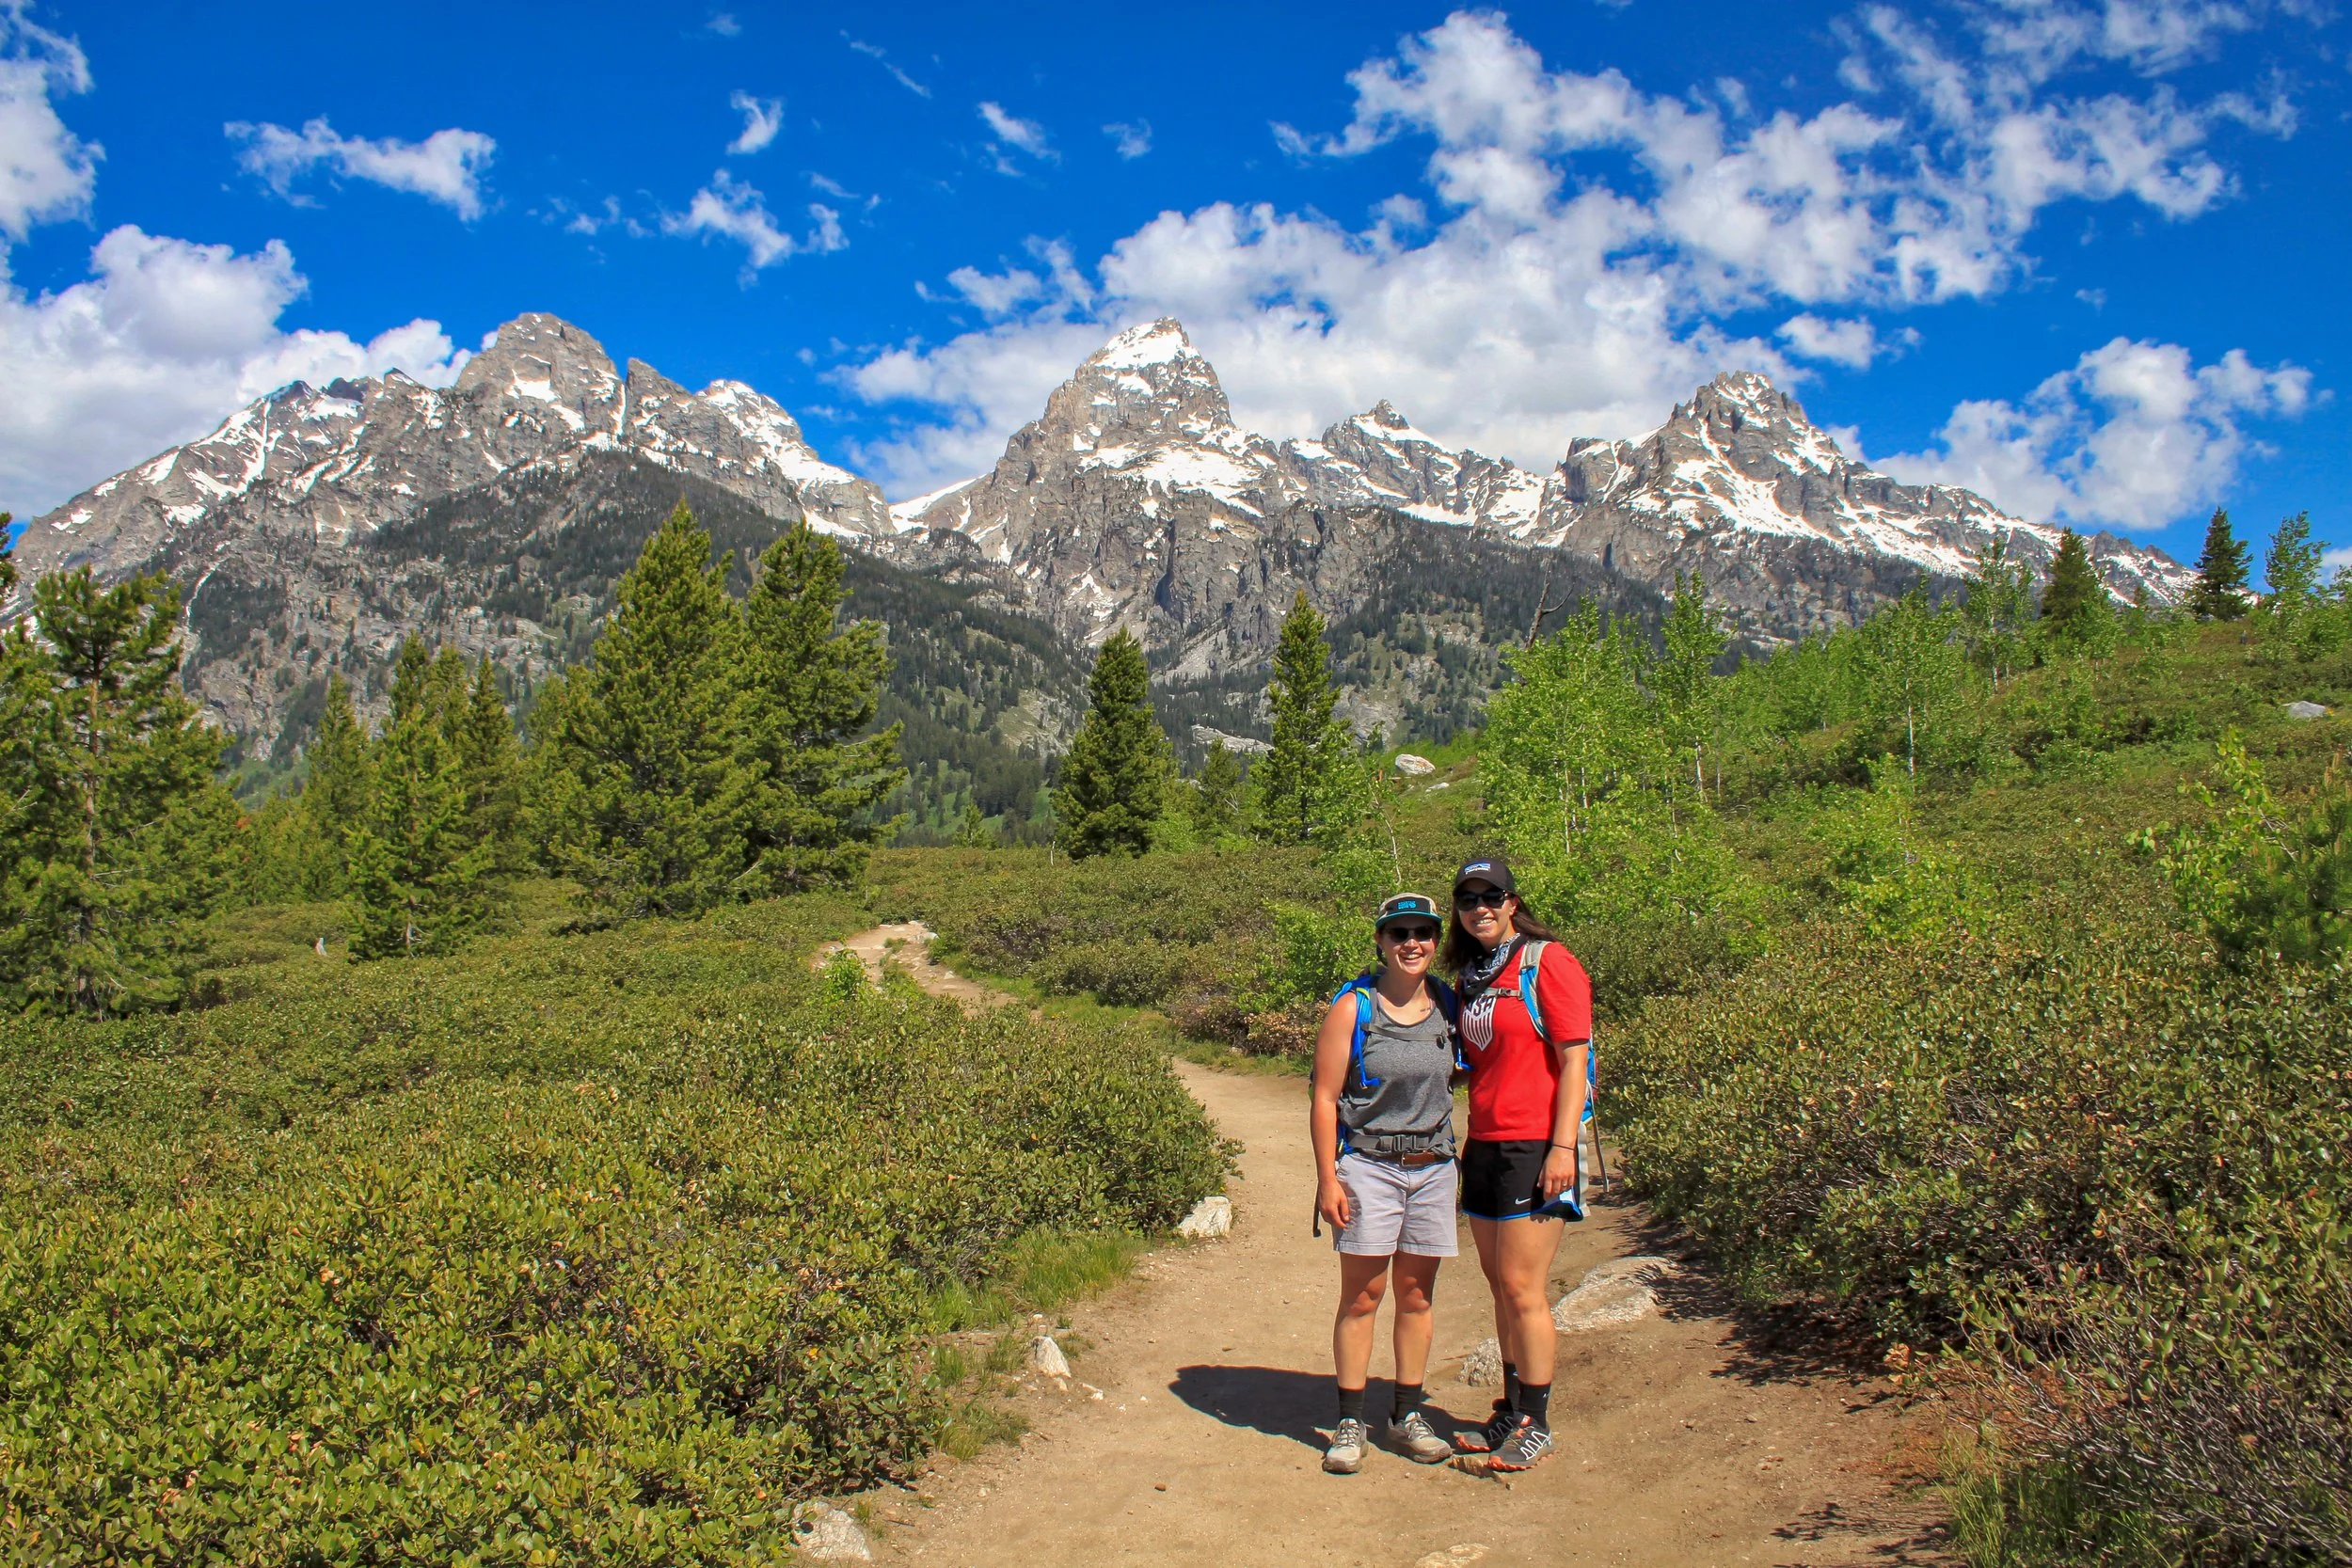
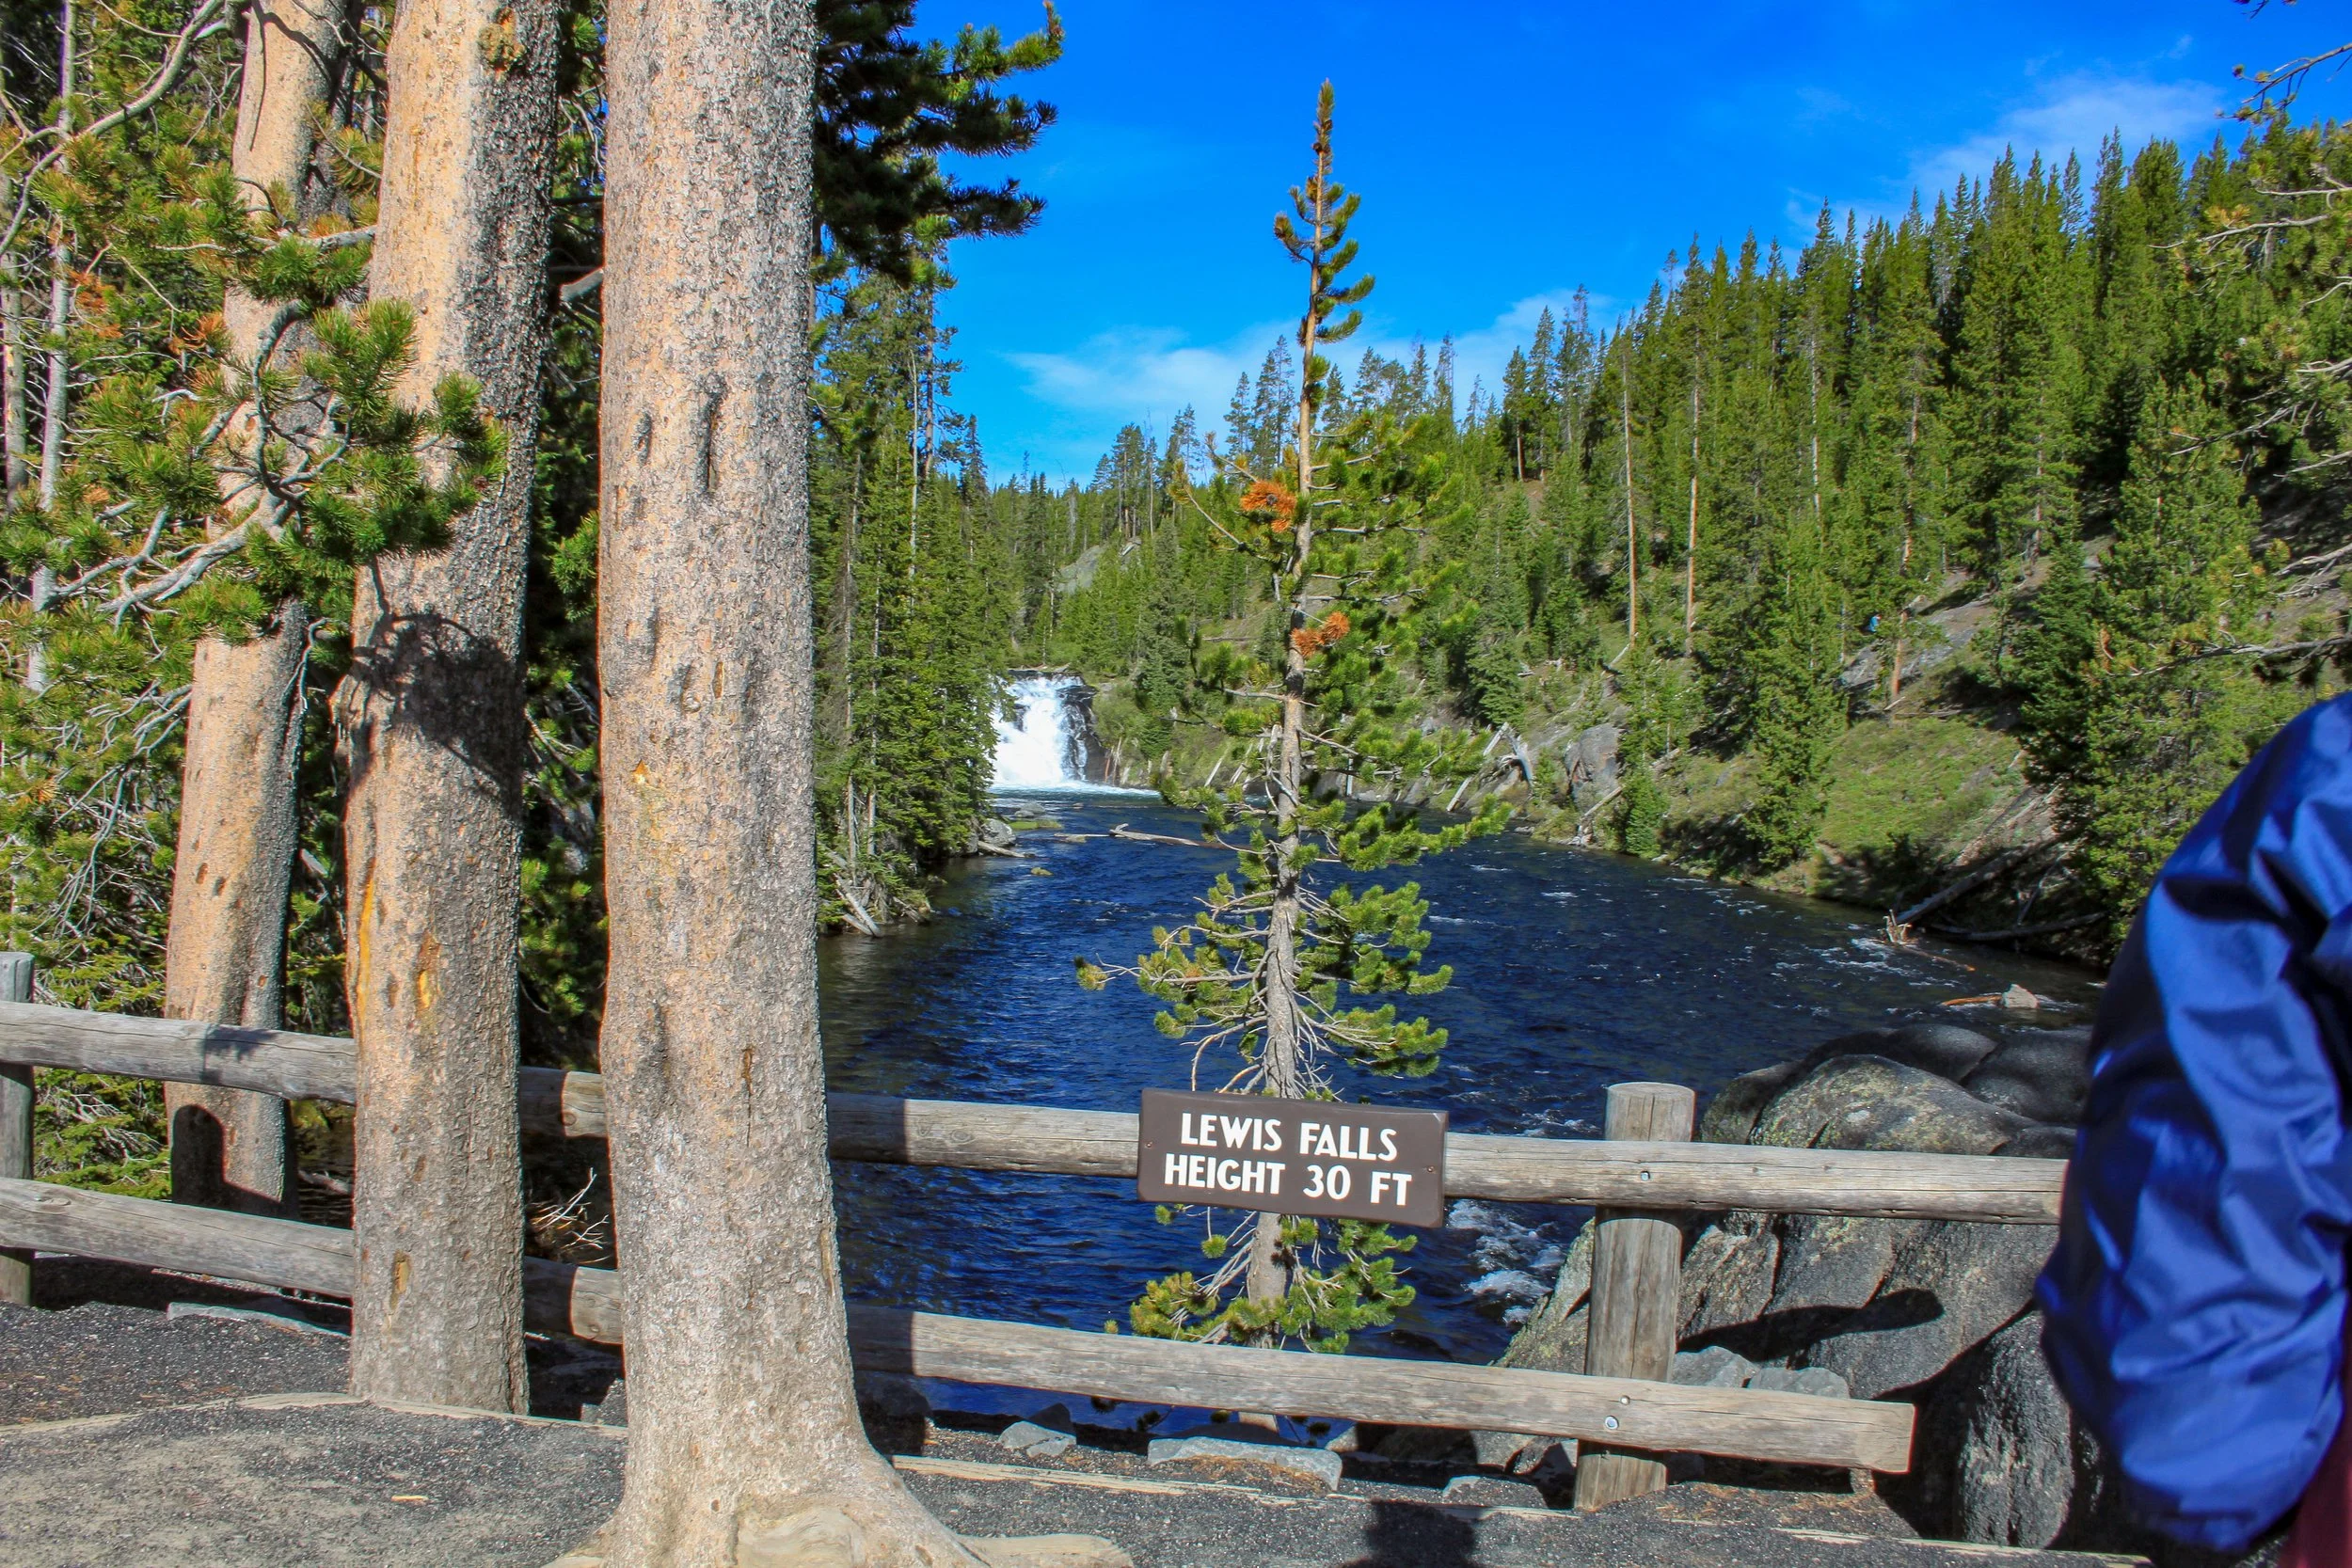
Day two in Yellowstone started off at Lewis Falls. This is a quick stop right on the side of the road and can be seen in less than ten minutes. Make sure before you leave you cross the street and take in the views! The river takes several turns here and you are able to see the Tetons in the distance.

We continued our drive into the park and approached the fork in the park just past Grant Village. You have two options- you can head west toward Old Faithful or East along Yellowstone Lake. During our first day in the park we took the western route so today we decided to drive east to get to the Grand Canyon of the Yellowstone. On the way you’ll drive through Hayden Valley- great wildlife viewing, especially at sunrise and dusk.

This area of the park is a high Grizzly territory, definitely carry your bear spray. We chose to park at Artist’s Point where you can access a great viewing area of the falls and canyon as well as access to other trails.

After viewing the falls we walked the paved South Rim Trial to Uncle Tom’s Point. This gets you up close with the falls but isn’t as crowded as the even closer Brink of the Lower Falls Trail.
From here I would recommend driving toward Norris. On our drive we saw a large amount of cars parked on the side of a stretch of road which means one thing: wildlife. Directly off the road in a field was a momma grizzly and her cubs.


In the same patch of grass there was a deer sleeping with no idea the excitement going on (taken with a zoom lens).

After experiencing the wildlife we continued on to Norris. The best thing to do when you get to the Norris area is to visit the Norris Geyser Basin. If it’s a hot day I’d recommend waiting to walk around the Geyser Basin- it’s a series of boardwalks that is a loop circuit that’s fully exposed to the sun.


After walking the geyser basin we headed south back toward our campground but not without making one stop first. It was time to get some ice-cream and see Old Faithful. Once you get to the Old Faithful area there’s a parking area with plenty of spots. The eruption/viewing area is a boardwalk with a series of benches to sit while you wait. Old Faithful erupts on a schedule that you can check each day to get the times.

After enjoying Old Faithful it’s worth stopping into the Lodge. Originally built in 1920 it is absolutely stunning, and they have ice cream. It’s a must on every trip that we take we enjoy ice cream along the way and this one certainly didn’t disappoint.
Day 3 in Yellowstone (trip day 5)
We spent our third and final day in Yellowstone checking out Grand Prismatic Spring and then hiking out to see Fairy Falls.

To get here you’re going to park at the Fairy Falls trailhead. Then you’ll take the trail 0.6 miles to the Grand Prismatic Overlook. The parking lot is not that big and tends to fill up quick so I would recommend doing this early in the day.

The approach trail to Grand Prismatic is relatively flat up to the end where you gain some quick elevation to the overlook.


After the overlook you’re going to continue on the Fairy Falls trail for one mile, this trail is relatively flat and family friendly.